

Simply Red Christmas Nails
As Christmas is fast approaching I thought it was about time that I did a Christmas Nail tutorial. Growing up I was always painting my finger nails, like many other teenage girls, and before our twins were born I embarked on a nail course. Although I wasn’t able to finish the course, creating beautiful, long lasting nails is still something I enjoy doing. Here I will share with you a simple festive Christmas nail look which I call ‘Simply Red.’
1. Ensure your nails are clean by removing any old nail varnish and grime. Use an acetone free nail varnish remover and apply a small amount to a cotton wool ball. A lot of people tend to just rub away at the nail until all the varnish has been removed, but a good tip is to hold the cotton wool onto your nail for five seconds before you start to rub the varnish off. This helps the nail varnish remover to sink in and makes it easier for you to remove any old varnish
2. Next up you’ll want to shape your nails to your desired shape. I prefer a more rounded shape, but square shapes work just as well. Use a nail cutter or scissors and trim back any nails that are too long. It’s important to make sure all your nails are roughly the same length
3. Grab your nail file and file away any sharp or jagged edges. File in the same direction to avoid damaging your nails
4. Take care of your cuticles! People quite often neglect their cuticles (the skin immediately around the fingernail), but it’s important to take care of them. Uncared for cuticles are prone to hangnail and dryness and if you bite your nails it can even cause infection. To care for your cuticles follow these simple steps:
- Moisturise your hands and cuticles
- Never cut your cuticles – their job is to protect the roots of your nails from bacteria
- Wet your cuticles by soaking your hand in a bowl of water and then apply cuticle remover
- Using a cuticle stick push back your cuticles. You can also move the stick in a circular motion to remove dead skin
- Cut hangnails carefully using a sharp cuticle nipper
5. Once you are happy with the shape of your nails apply one layer of base coat. I use Loreal Paris La Manicure, 2-in-1 Protect. It’s great as it also doubles up as a top coat! Allow to dry completely

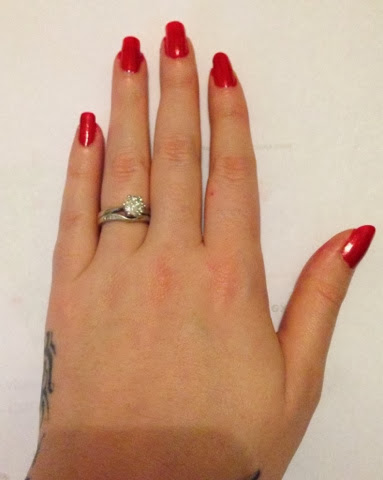
6. Apply your colour to your nails and allow to dry completely. I’ve used Avon’s Nailwear Pro in Ruby Slippers
7. Apply a second coat to your nails and again allow to dry completely. Don’t worry at this moment if you get some of the colour on your skin, we can remove this later on
8. Apply one or two coats of top coat as desired and allow to dry
9. Enjoy your fabulously festive simply red nails!
This nail design is a pretty simple one that anyone can do.

What do you think?
