Hobbycraft Fourth Birthday Cake Project


I kept a very close eye on the cakes whilst they were baking as we moved house recently and I wasn’t sure how quickly or slowly the oven would cook the cake. Turns out the 10″ cake only took an hour in comparison to an hour and a half in the oven in our last home, whereas the 8″ cake took the correct amount of time according to the recipe.

Once the cakes were completely cool I smoothed a layer of frosting on one of the 10″ cakes and raspberry jam on the other before sandwiching them together and covering them in frosting.

In hindsight I should have used a thinner layer of buttercream on the outside of the cake, which I did for the 8″ cakes afterwards. Once covered in frosting I made a start on icing the cakes.
Using the dark blue ready to roll icing, I covered my worktop in icing sugar to prevent the icing from sticking and then kneaded the icing until pliable (soft) and then rolled it out thinly and big enough to cover the entire cake. Although I would only be covering half of the cake with the icing so I used a knife to cut a straight line down one side of the icing before draping it over the cake and smoothing it down with my hand.

I then used a cake smoother to smooth the icing again. The next step was to ice the other half of the cake using light blue icing with the same technique as above.

I then repeated these steps for the 8″ cakes which were half red and half light blue.


Again, I wasn’t too concerned about the line going up the side and along the top of the cake being straight as it would be hidden by decoration. I then left the cakes overnight to allow the icing to harden before adding the decorations.
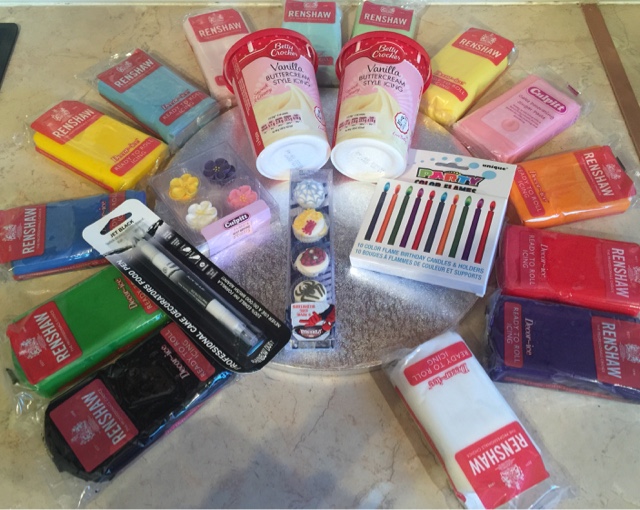
The first thing I did to decorate the bottom tier of the cake was to use the black icing to cut the shapes of the buildings. Using a small paintbrush and a very small amount of water to stick them onto the cake. I then rolled the black icing into balls to adorn the base of the cake.
Next up were the windows and stars. Using square and star plungers, I used the bright yellow icing. I didn’t want to overdo the decorations, but I did use one of the spiderman 2d decorations to stick onto one of the windows using frosting.
The great thing about decorating a cake like this is that you can place the stars over areas of the cake that perhaps aren’t perfect to hide any imperfections!

As this is a two tier cake it’s important to ensure that the bottom tier has enough support to prevent the top tier from squashing the bottom tier and sinking. This meant I used some rods to add support. The top tier was also placed onto a cake board which was then attached to the bottom tier with frosting.
I decorated the other side of the bottom tier in a Peppa Pig theme. Using the light green icing I cut the shapes of the hills and applied them to the cake, followed by rolling some green icing balls to adorn the other half of the base. Next up I used some white icing to make the cloud shapes.
I used some wafer paper Peppa Pig decorations and applied them using the frosting before sticking some of the wild rose sugar toppers to the sides of the cake too.

The top tier was decorated in pretty much the same way, but with the addition of a large yellow sun.


The most challenging part of the cake was the spiderman piping. I didn’t want to overdo the lines so I started off slowly with my piping bag. I then cut out two identical shapes using the black icing to form the eyes, followed by two slightly smaller shapes with the white icing.

The finishing touch was to make more round iced balls to go up the side of the cake, as well as on top of the bottom tier/base of the top tier.

Overall, this was the most challenging cake that I’ve ever made, but I’m pretty pleased with the results, as were our twin girls, which was the most important thing!
Thanks to Hobbycraft for supplying with a lot of the products to make this cake.

15 Comments
Hannah Brown
March 2, 2016 at 7:18 am
It looked amazing!!!!!!! You did so well, not impressed I didn't get to taste it!!! Lol xxx
Random Musings
March 4, 2016 at 1:02 pm
Omg, this is amazing! It looks like two totally separate cakes and both are fab. I love the Spiderman piping. I'm glad the girls liked it and I hope they both enjoyed their birthday 🙂 Thanks for hosting the #binkylinky
Debbie
Katie Davies
March 2, 2016 at 8:28 am
It was a very impressive cake!
Jennifer
March 2, 2016 at 9:14 am
Wow, that is absolutely amazing, well done! I don't think I could bear to cut it! I bet they were thrilled with it.
Helen Gandy – Beautiful Things
March 2, 2016 at 8:48 pm
Wow Emily how amazing! It looks great and you have done an amazing job, I bet the girls loved it. Thanks for linking up #bestandworst
kerry norris
March 3, 2016 at 11:26 am
Wow wow wow Emily. Super mum or what. These are fantastic. Such a thoughtful thing to do for your children. You did them proud. They are fab x
Entertaining Elliot
March 3, 2016 at 10:19 pm
wow that is brilliant, lucky twins!! xx
Jessica Powell
March 4, 2016 at 2:02 pm
This cake is just amazing! Such a cool idea to have a two sided cake x #binkylinky
Jodie Allen
March 4, 2016 at 4:34 pm
That is one awesome cake! What a great idea to make a double themed cake! I love it 🙂 #BinkyLinky
YOUTHEDADDY
March 5, 2016 at 11:49 am
Seriously impressive baking skills, that even Paul Hollywood would be proud of. You should do the Bake Off! #justanotherlinky
Mrs Tubbs
March 5, 2016 at 5:46 pm
Wow! Both of these are stunning! Well done. Hope the twins had a great birthday 🙂
Helen Gandy – Beautiful Things
March 5, 2016 at 8:38 pm
Thanks for hosting 🙂 #binkyliny
thebutterflymother
March 6, 2016 at 9:44 pm
Absolutely fantastic!!! Great job 🙂 #binkylinky
Something Crunchy Mummy
March 10, 2016 at 8:30 pm
All I can say is that cake is AMAZING!!! Thanks for linking up to #justanotherlinky xx
Laura Side Street
March 10, 2016 at 11:05 pm
Wow what an amazing cake – I love that it has two sides to it – so creative, I bet the girls loved it
Laura x