
How to Install Wood Flooring: A Step-by-Step Guide for Beginners
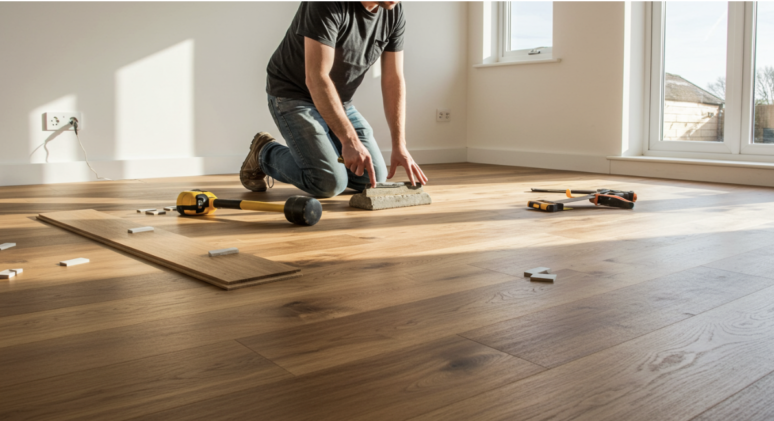
Wood flooring is a timeless and elegant choice that adds warmth and character to any home. While many people hire professionals for installation, doing it yourself can be a rewarding and cost-effective option—if you’re up for the challenge! Whether you’re fitting engineered or solid wood flooring, the process requires careful preparation and attention to detail.
If you’re a beginner, don’t worry—I’ve broken it down into simple, manageable steps. Follow this guide, and you’ll have stunning new floors in no time!
Step 1: Choose the Right Type of Wood Flooring
Before you begin, it’s important to select the right type of wood flooring for your space. The two main options are:
- Solid wood flooring – Made from 100% natural wood, this option is durable and long-lasting but can be more challenging to install due to expansion and contraction with temperature changes.
- Engineered wood flooring – Made from layers of wood with a hardwood veneer, this option is more stable and often easier for beginners to install, especially if it comes with a click-lock system.
If you’re new to DIY flooring, I’d recommend engineered wood flooring with a click system, as it requires no glue or nails.
Step 2: Gather Your Tools and Materials
Before starting, make sure you have all the necessary tools:
✅ Wood flooring planks
✅ Underlay (if required)
✅ Measuring tape
✅ Pencil
✅ Spacers
✅ Saw (hand saw or jigsaw)
✅ Flooring pull bar
✅ Rubber mallet
✅ Tapping block
✅ Spirit level
If you’re installing solid wood flooring, you may also need an adhesive or a nail gun.
Step 3: Prepare the Subfloor
A successful installation starts with a clean, dry, and level subfloor. Any bumps or uneven areas can cause your flooring to sit incorrectly, so follow these steps:
- Remove old flooring – Take up any existing carpet, tiles, or old wood flooring.
- Clean the subfloor – Vacuum thoroughly to remove dust and debris.
- Check for moisture – Wood and moisture don’t mix! If you’re installing over concrete, use a moisture meter to check levels.
- Level the surface – If your floor is uneven, use a self-levelling compound or sand down high spots.
If you’re installing on concrete, make sure to use a damp-proof membrane to prevent moisture from damaging your new wood flooring.
Step 4: Acclimatise Your Wood Flooring
Wood naturally expands and contracts based on temperature and humidity. To prevent warping after installation, let your flooring acclimatise by placing the planks in the room for at least 48 hours before fitting. Keep the boxes flat and open for proper airflow.
Step 5: Lay the Underlay (If Needed)
If you’re using engineered wood flooring or installing over concrete, an underlay helps with sound reduction, insulation, and moisture protection. Simply roll it out across the subfloor, ensuring the edges don’t overlap.
Step 6: Plan the Layout
Now comes the fun part—deciding how you want your planks to run! Here are a few tips:
✅ Lay planks parallel to the longest wall to create a more spacious look.
✅ Avoid small cuts at the edges—adjust your layout to ensure your final row is at least half a plank wide.
✅ Stagger the joints by at least 30cm to create a natural, visually appealing pattern.
Once you’ve planned your layout, you’re ready to start installing!
Step 7: Start Laying Your Wood Flooring
If you’re using click-lock flooring:
- Place spacers along the walls to leave a 10mm expansion gap.
- Start in a corner and lay your first plank with the tongue side facing the wall.
- Connect the next plank by clicking it into place. Use a rubber mallet and tapping block to ensure a snug fit.
- Continue across the room, cutting planks as needed to fit the edges.
If you’re using glued or nailed flooring:
- Apply adhesive with a trowel or use a nail gun to secure the planks to the subfloor.
Make sure to stagger the planks for a natural finish!
Step 8: Cut Planks to Fit
When you reach the end of a row, you’ll likely need to cut the last plank. Measure carefully and use a saw to make a clean cut. If you’re cutting around door frames or tricky areas, a jigsaw can make the job easier.
Step 9: Finish the Final Row
When you get to the last row, you may need to trim the planks lengthwise. A pull bar can help lock them into place. Remember to leave that 10mm expansion gap along the walls!
Step 10: Add the Finishing Touches
Once all the planks are in place, remove the spacers and fit your skirting boards or beading to cover the expansion gap. If necessary, use a door threshold to create a seamless transition between rooms.
Give your new wood flooring a gentle clean to remove dust, and you’re done!
Final Thoughts
Installing wood flooring might seem daunting, but with the right preparation and patience, even beginners can achieve a professional-looking result. The key is to take your time, follow the steps carefully, and enjoy the process!
If you’re looking for high-quality engineered or solid wood flooring, be sure to check out our range at Flooring365.co.uk. Happy flooring!
